Aperture is a fundamental element of photography that profoundly impacts image composition, depth of field, and overall image quality. In this comprehensive guide, we will delve into everything you need to know about aperture, from its definition and functions to practical tips for using it effectively in various photography scenarios.
A Photographer’s Complete Guide
What is Aperture?
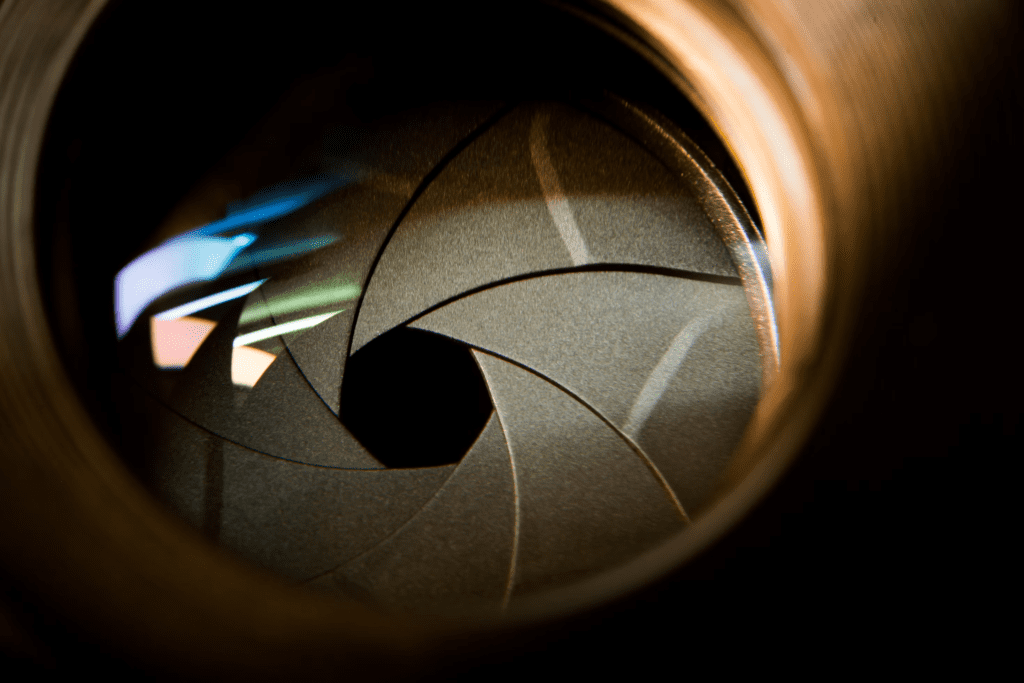
Photo by Wan San Yip on Unsplash
Aperture refers to the opening in the lens through which light passes to reach the camera sensor. It is measured in f-stops, with smaller f-stop numbers indicating larger openings and vice versa. Understanding aperture involves grasping its role in controlling exposure and depth of field in photography.
How A Photographer’s Complete Guide Works
- Exposure Control: Aperture directly affects the amount of light entering the camera. Larger apertures (smaller f-stop numbers like f/2.8) allow more light, suitable for low-light conditions or achieving faster shutter speeds. Smaller apertures (higher f-stop numbers like f/16) reduce the amount of light, ideal for bright environments.
- Depth of Field (DOF): Aperture influences the range of sharpness in an image, known as depth of field. A wider aperture (lower f-stop) results in a shallow DOF, blurring the background and emphasizing the subject. Conversely, a smaller aperture (higher f-stop) increases DOF, keeping more of the scene in focus from foreground to background.
A Photographer’s Complete Guide
Types of Aperture
- Fixed vs. Variable Aperture: Fixed aperture lenses maintain a constant maximum aperture regardless of focal length, while variable aperture lenses adjust their maximum aperture as focal length changes.
- Prime vs. Zoom Lenses: Prime lenses have a fixed focal length and often wider maximum apertures (e.g., f/1.8), ideal for portraits and low-light photography. Zoom lenses offer variable focal lengths and apertures, providing versatility for different shooting situations.
A Photographer’s Complete Guide
Practical Tips for Using Aperture
Photo by Alif Ngoylung on Unsplash
- Portrait Photography: Use wide apertures (e.g., f/2.8 or lower) to create a shallow depth of field, isolating subjects from backgrounds for a pleasing bokeh effect.
- Landscape Photography: Opt for smaller apertures (e.g., f/8 to f/16) to maximize depth of field, ensuring sharpness from foreground elements to distant landscapes.
- Macro Photography: Narrow apertures (e.g., f/11 to f/22) help achieve sufficient DOF when capturing close-up details of small subjects.
A Photographer’s Complete Guide
Advanced Techniques with Aperture
- Hyperfocal Distance: Understanding the distance at which to focus to maximize DOF from near to infinity, crucial for landscape photography.
- Creative Effects: Experiment with aperture to manipulate background blur, emphasize specific elements in the frame, or create starbursts from light sources.
A Photographer’s Complete Guide
Aperture and Camera Settings
Photo by William Bayreuther on Unsplash
- Manual Mode: Adjust aperture manually for precise control over exposure and depth of field, complementing shutter speed and ISO settings.
- Aperture Priority Mode: Set the desired aperture while the camera adjusts shutter speed for optimal exposure, ideal for quick adjustments in changing light conditions.
A Photographer’s Complete Guide
Common Mistakes with Aperture
Photography is as much about technical mastery as it is about creativity. One crucial technical element is the aperture, which controls the amount of light entering the camera and affects the depth of field and overall sharpness of the image. Lighting is very important in photography. However, there are common mistakes photographers make when dealing with aperture settings. Let’s delve into these pitfalls and understand how to avoid them in a more relatable, everyday language.
Ignoring Depth of Field
Photo by Dollar Gill on Unsplash
One of the most common mistakes is ignoring the depth of field, which is directly influenced by the aperture setting. Depth of field refers to the area in an image that appears sharp and in focus. When photographers fail to consider this, they can end up with photos that don’t turn out as intended.
A Photographer’s Complete Guide
Understanding Depth of Field
- Wide Aperture (Low f-number): A wide aperture (like f/1.8 or f/2.8) creates a shallow depth of field, meaning only a small part of the image will be in sharp focus while the background and foreground will be blurred. This is great for portraits, where you want your subject to stand out against a soft background.
- Narrow Aperture (High f-number): A narrow aperture (like f/11 or f/16) increases the depth of field, keeping more of the image in focus. This is ideal for landscape photography where you want everything from the foreground to the distant background to be sharp.
Real-Life Scenarios
Imagine you’re taking a portrait of a friend in a park. If you use a wide aperture (like f/1.8), your friend’s face will be sharply in focus while the background will be beautifully blurred, making them stand out. However, if you overlook this and use a narrow aperture (like f/16), the background might be too detailed and distracting, taking attention away from your friend.
Conversely, if you’re photographing a scenic mountain range and use a wide aperture, parts of the landscape might be out of focus, which isn’t usually desirable in landscape photography. Here, a narrow aperture ensures the entire scene is crisp and clear.
A Photographer’s Complete Guide
Tips to Avoid This Mistake
- Know Your Subject: Decide what needs to be in focus. For portraits, go for a wide aperture. For landscapes or group photos, choose a narrow aperture.
- Preview the Depth of Field: Many cameras have a depth of field preview button that shows you how the aperture setting will affect the final image.
- Practice and Experiment: Take photos with different apertures and compare the results. This hands-on approach helps you understand how aperture affects depth of field in various scenarios.
A Photographer’s Complete Guide
Overlooking Lens Characteristics
Photo by ShareGrid on Unsplash
Another common mistake is overlooking the specific characteristics and optimal performance range of your lens. Every lens has its own “sweet spot,” typically two to three stops down from the maximum aperture, where it delivers the sharpest images.
A Photographer’s Complete Guide
Understanding Lens Characteristics
- Lens Sharpness: Lenses are usually not at their sharpest at the extreme ends of the aperture range (either fully open or fully closed). For instance, a lens that can open up to f/1.4 might be sharpest around f/4.
- Chromatic Aberration and Distortion: Wide apertures can sometimes introduce chromatic aberration (color fringing) and distortion, especially in less expensive lenses. Narrowing the aperture can reduce these issues.
- Bokeh Quality: The quality of the out-of-focus areas (bokeh) varies between lenses and is affected by the aperture setting. Some lenses produce more pleasing bokeh than others, which can enhance your photos.
A Photographer’s Complete Guide
Real-Life Scenarios
Suppose you’re shooting with a 50mm f/1.4 lens. If you consistently shoot at f/1.4 because you love the shallow depth of field, you might notice that the images aren’t as sharp as you’d like, especially around the edges. By stopping down to f/2.8 or f/4, you might find the images significantly sharper, providing a better balance between sharpness and background blur.
When using a kit lens (like an 18-55mm f/3.5-5.6), you might notice that images taken at f/3.5 are softer. Understanding that your lens performs best around f/8 can help you get sharper images, even if it means compromising a bit on the depth of field.
A Photographer’s Complete Guide
Tips to Avoid This Mistake
- Research Your Lens: Look up reviews and technical tests for your lens. Websites like DXOMark and Photography Life provide detailed lens performance analysis.
- Test Your Lens: Take photos at different apertures and examine the sharpness, especially at the center and edges of the frame. Find the aperture that gives you the best results.
- Understand Limitations: Be aware of your lens’s limitations and work around them. If your lens is prone to chromatic aberration at wide apertures, consider using a narrower aperture or correcting the issue in post-processing.
A Photographer’s Complete Guide
Combining Depth of Field and Lens Characteristics
Balancing depth of field with your lens’s optimal performance is essential for achieving the best possible images.
A Photographer’s Complete Guide
Scenario: Portrait Photography
You want a sharp portrait with a beautifully blurred background. If your 85mm f/1.8 lens is soft at f/1.8, try shooting at f/2.8. This still gives you a shallow depth of field but with improved sharpness.
Scenario: Landscape Photography
For a landscape shot, you need a wide depth of field and sharpness throughout the image. If your lens performs best at f/8, use this aperture and focus a third into the scene to maximize depth of field.
A Photographer’s Complete Guide
Additional Considerations
- Low Light Conditions: In low light, you might need to use a wider aperture to allow more light in. Understanding your lens’s performance at these settings can help you make the best choice between sharpness and exposure.
- Creative Choices: Sometimes, breaking the rules can lead to unique and creative results. Understanding aperture and lens characteristics empowers you to make informed decisions, even if they’re unconventional.
Conclusion
Mastering aperture is essential for photographers aiming to control exposure, depth of field, and creative expression in their images. By understanding aperture’s technical aspects, experimenting with different settings, and applying practical tips across various genres, photographers can elevate their photography skills and capture compelling, well-exposed images in any situation. Embrace aperture as a powerful tool in your photographic arsenal, enhancing your ability to create stunning visual stories through thoughtful and intentional use.


